The ActiveConversion software offers a variety of tools that assist you in organizing your contacts.
Tags are a useful tool that can be used to indicate specific details about contacts. Essentially, with tags, you are micro-organizing your data. Tags are not hierarchical, but they sort your data so that you can easily find what you’re looking for.
CREATING A TAG
There are a couple ways to create tags, we’ll show you both in this article:
- Enter your ActiveConversion account
- Hover over “Sales” and click “Contacts”
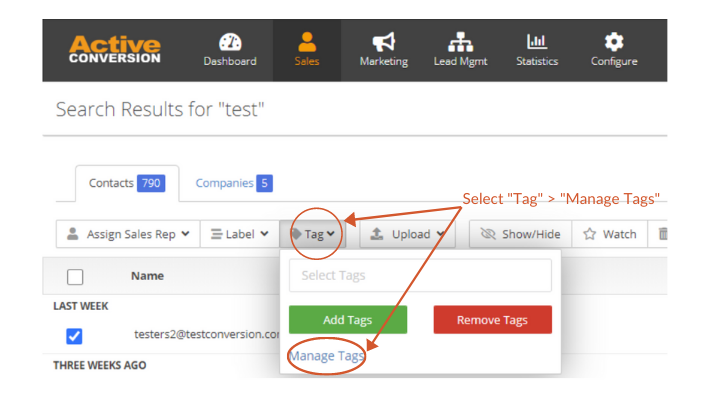
- Select a contact by clicking the check box to the left of their name
- Click “Tags” and select “Manage Tags”
- When entering this page you will now be able to create new tags, edit existing tags, or delete ones you no longer need.
- Once you’ve created the tag you will be able to start adding it to your contacts
Another way to create tags is:
- Enter your ActiveConversion account
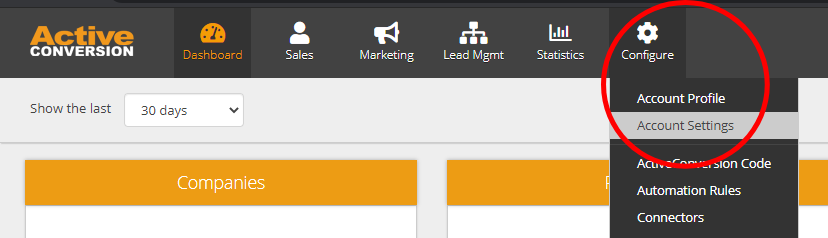
- Hover over “Configure” and select “Account Settings”
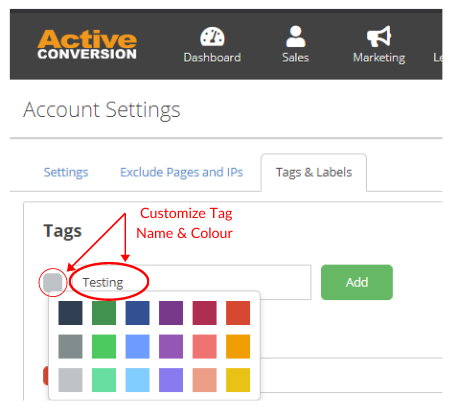
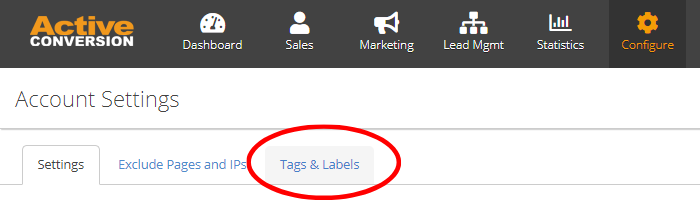
- Select the “Tags & Labels” option
- You will then land on the page to create new tags, edit existing tags, or delete ones you no longer need.
- Once you’ve created the tag you will be able to start adding it to your contacts
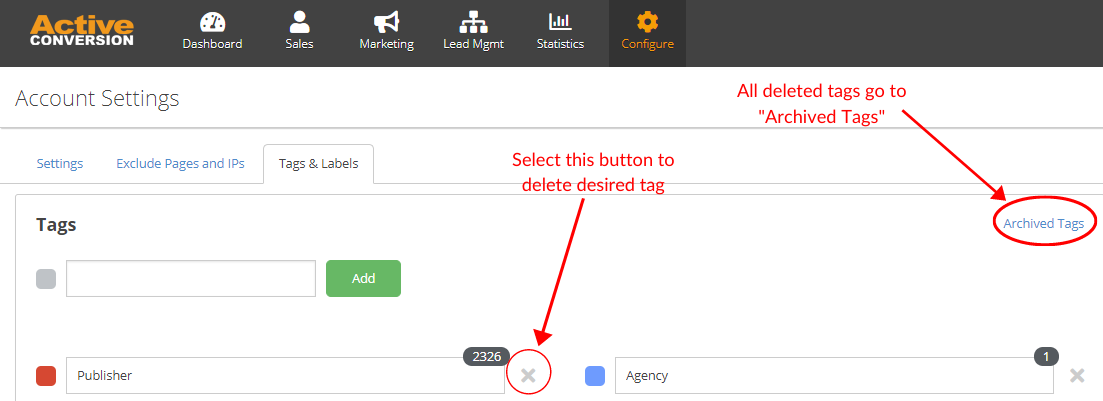
DELETING A TAG & RESTORING A DELETED TAG
- Enter your ActiveConversion account and navigate to the “Tags & Labels” page (see above for how to get there)
- Click the “x” button beside the tag you want to delete
- Once a tag is deleted, it automatically gets moved to “Archived Tags”
- Once deleted, the tag will be removed from all associated contacts and will no longer appear as an option when assigning tags to a contact
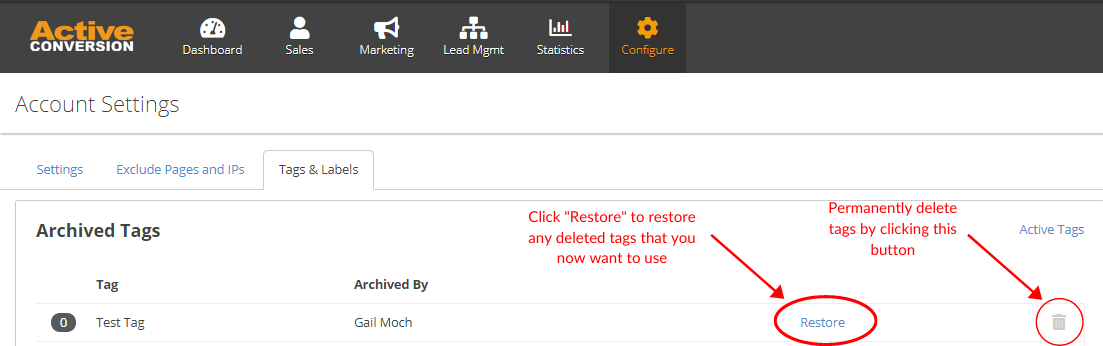
- If you want to restore a tag that was previously deleted, enter the “Archived Tags” screen and select the “Restore” button
- Restoring a tag will not only let you start adding the tag to contacts again, but will also reassign the tag to all the contacts who had it prior to deletion
- You can select the garbage can icon in the Archived Tags screen to permanently delete a tag
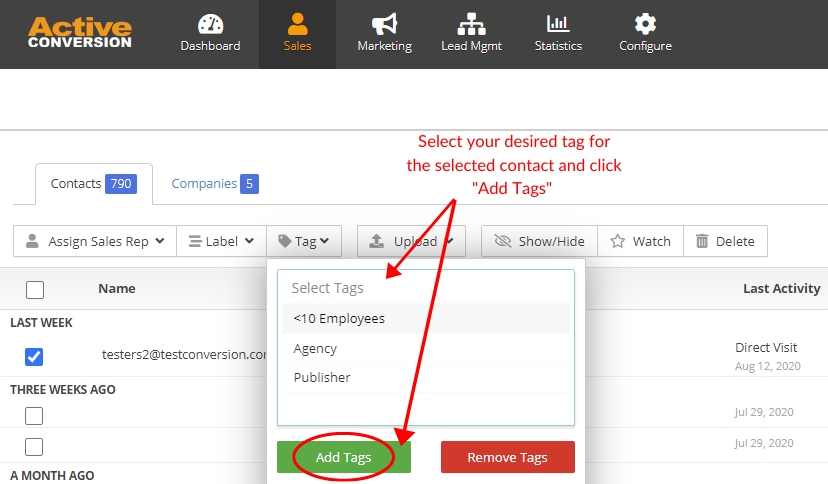
ASSIGNING A TAG
- Enter your ActiveConversion account
- Hover over “Sales” and click “Contacts”
- Select a contact by clicking the check box to the left of their name
- Click “Tags” and click into the “Select Tags” box
- Here you can now select any of the tags you want to assign to this contact (you can assign more than one tag to the contact)
- You can either scroll down the list of tags to choose the tags or you can type into the search box to find the tag
- Once you’ve selected the tags you want associated to the contact, click the green “Add Tags” button
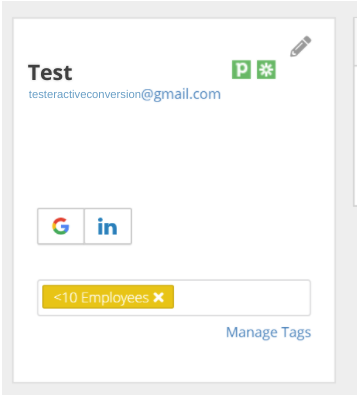
- The tags assigned to a contact will appear at the right hand side of the screen in contacts view and below a contacts name and details when viewing contact details

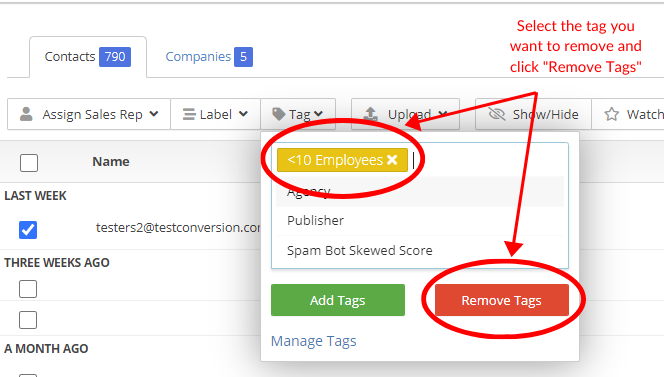
REMOVING A TAG
- If you want to remove a tag from a contact, select the contact by clicking the check box to the left of their name
- Click “Tags” and click the “Select Tags” box
- Select the tag you want to delete and then click “Remove Tags”
- You can also remove tags when viewing a contacts full details, simply click the “x” on the right hand side of the tag to remove it
VIEWING CONTACTS WITH SPECIFIC TAGS
- Enter your ActiveConversion account
- Hover over “Sales” and click “Contacts”
- Click the blue filter dropdown at the top right hand side of the screen
- Select “Create New Filter” (at the bottom of the list of all existing filters)
- A window will pop-up where you can name your filter, select the tags you want to view (you can choose more than one tag) and save the filter you’ve created
- Your filter will now only show contacts with the selected tag


TIPS ON TAGS
There are many different ways to use tags to help organize your data. Some other helpful tags that you can consider using to organize your data are;
- Company size
- Industry they operate in
- Geographic location (are they international or local)
- Event attendee
- Agency or publisher
- Whether they are a hot lead or not
These are just a few suggestions to help you get started. Chat with your team and find what tags work best for you!